
How to set up Cloudflare R2 storage
Follow these six steps — about 5 minutes — to get your own 10 GB of free file storage and public links that Noteey can open directly.
- 1
Step 1: Create a Cloudflare account and enable R2
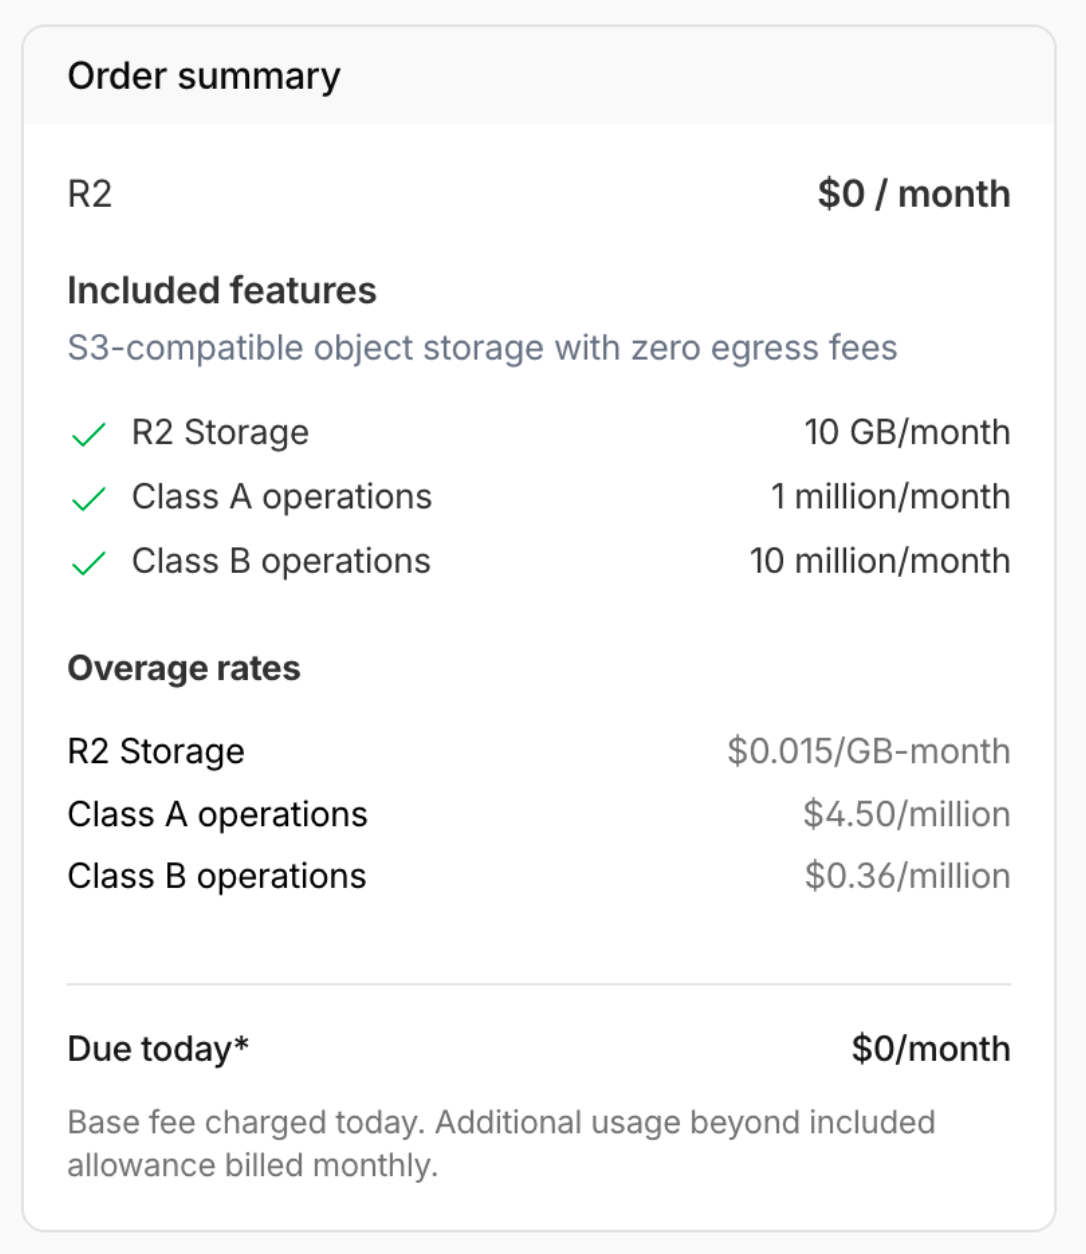
Sign up or log in to Cloudflare, then enable R2 Object Storage. The free plan includes 10 GB of storage plus 1 million Class A and 10 million Class B operations per month — plenty for everyday use.
- 2
Step 2: Create your bucket
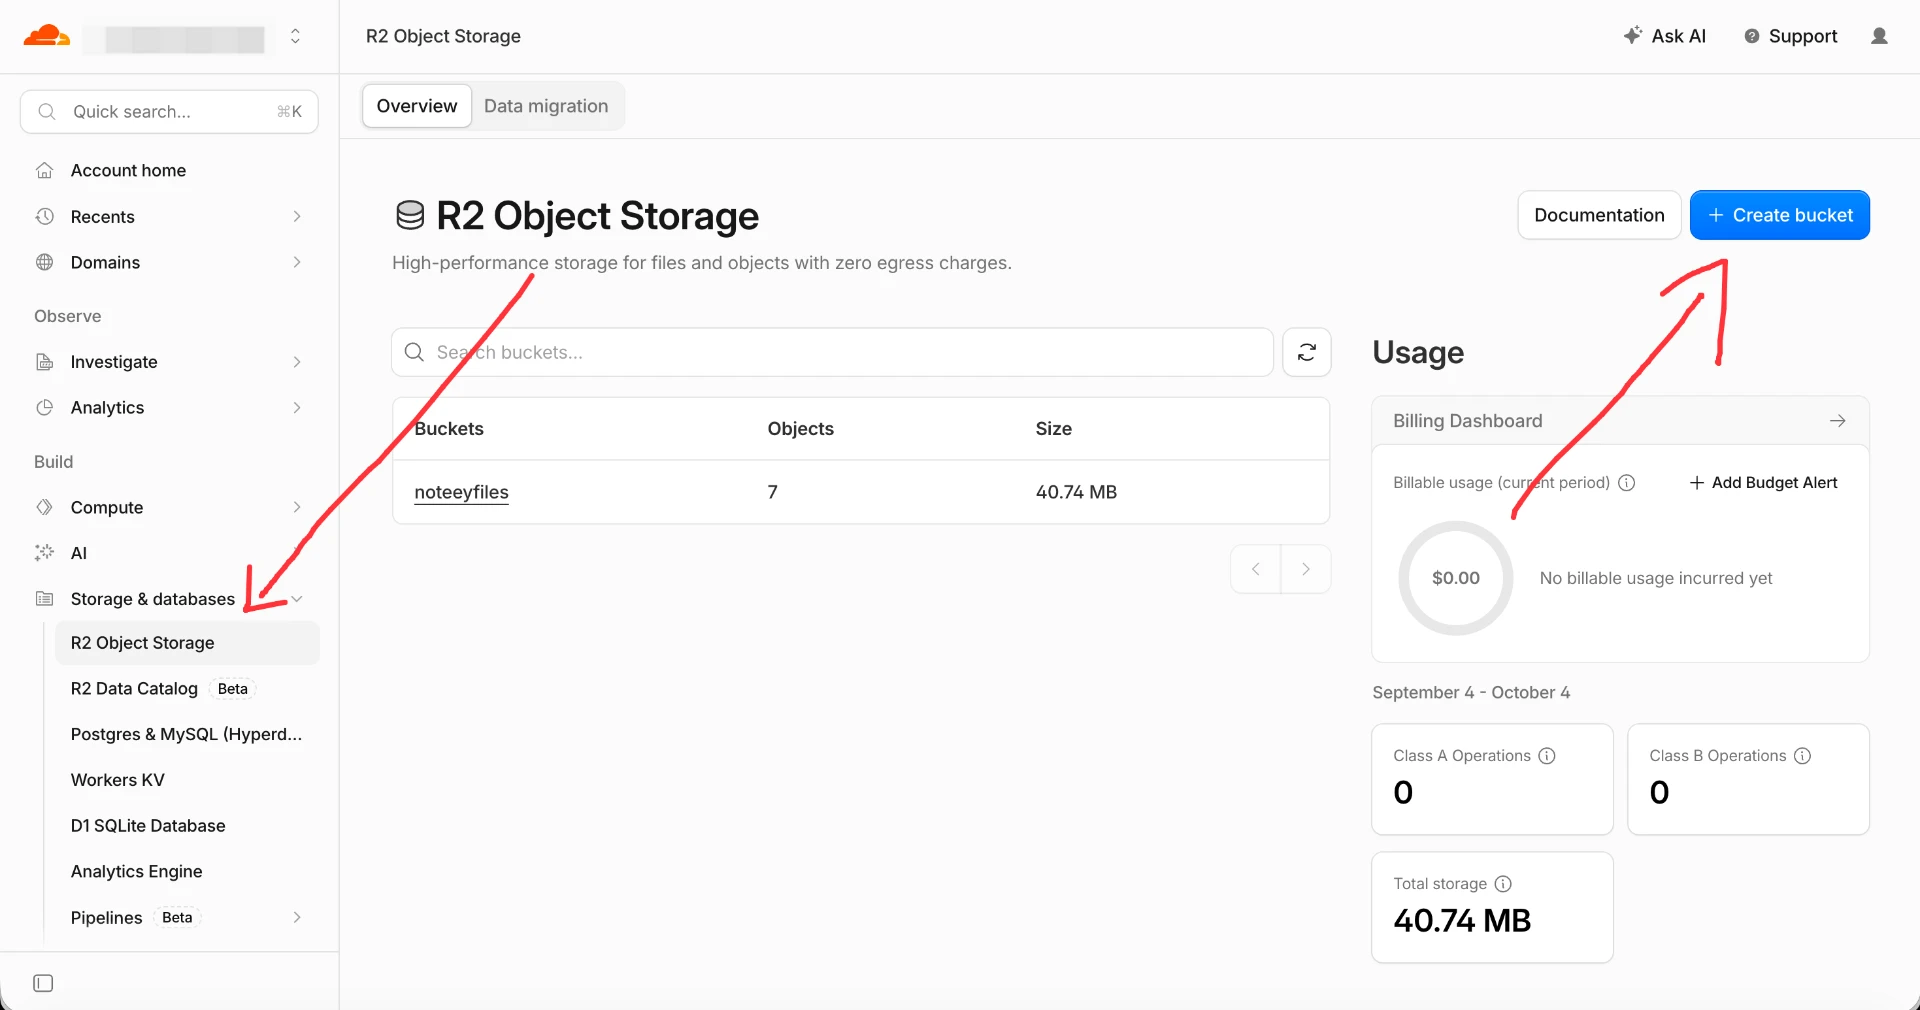
In the sidebar go to Storage & databases → R2 Object Storage, click Create bucket in the top right, and give it a name (for example noteeyfiles).
- 3
Step 3: Enable the Public Development URL
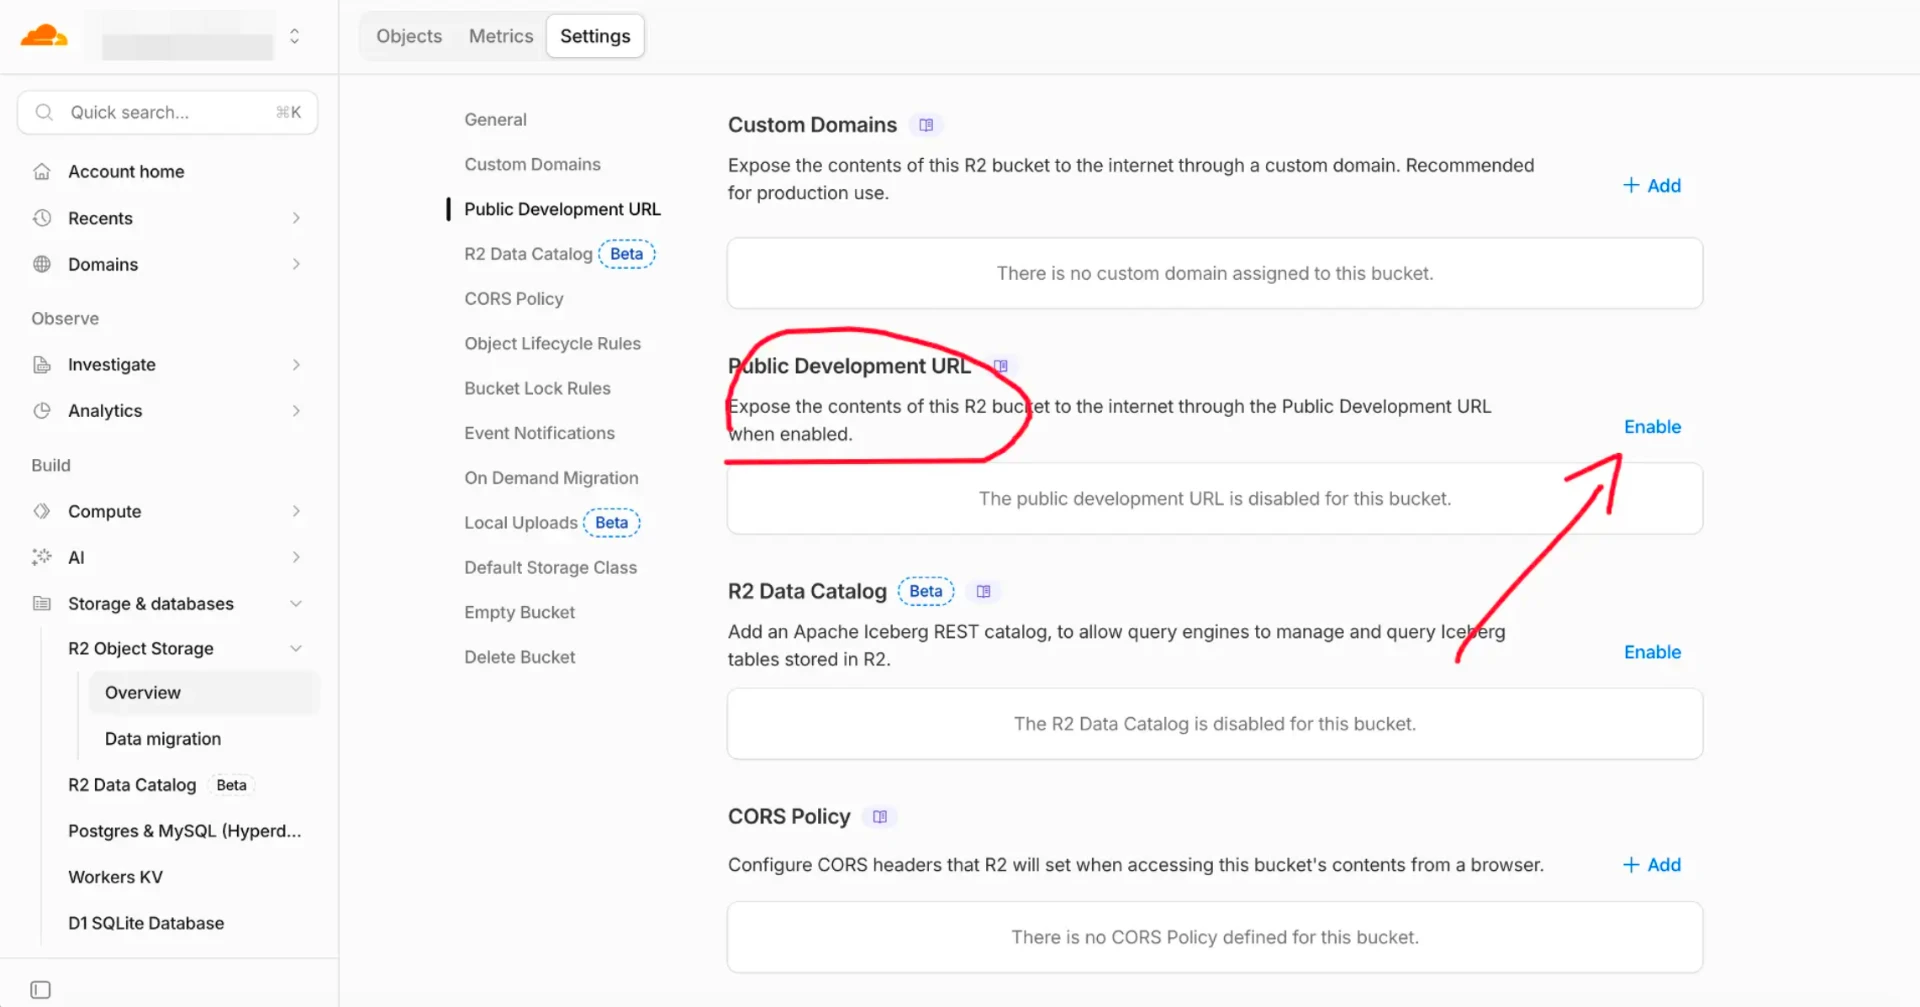
Open the bucket you just created, go to the Settings tab, find Public Development URL, and click Enable so files can be reached through a public link.
- 4
Step 4: Configure the CORS policy
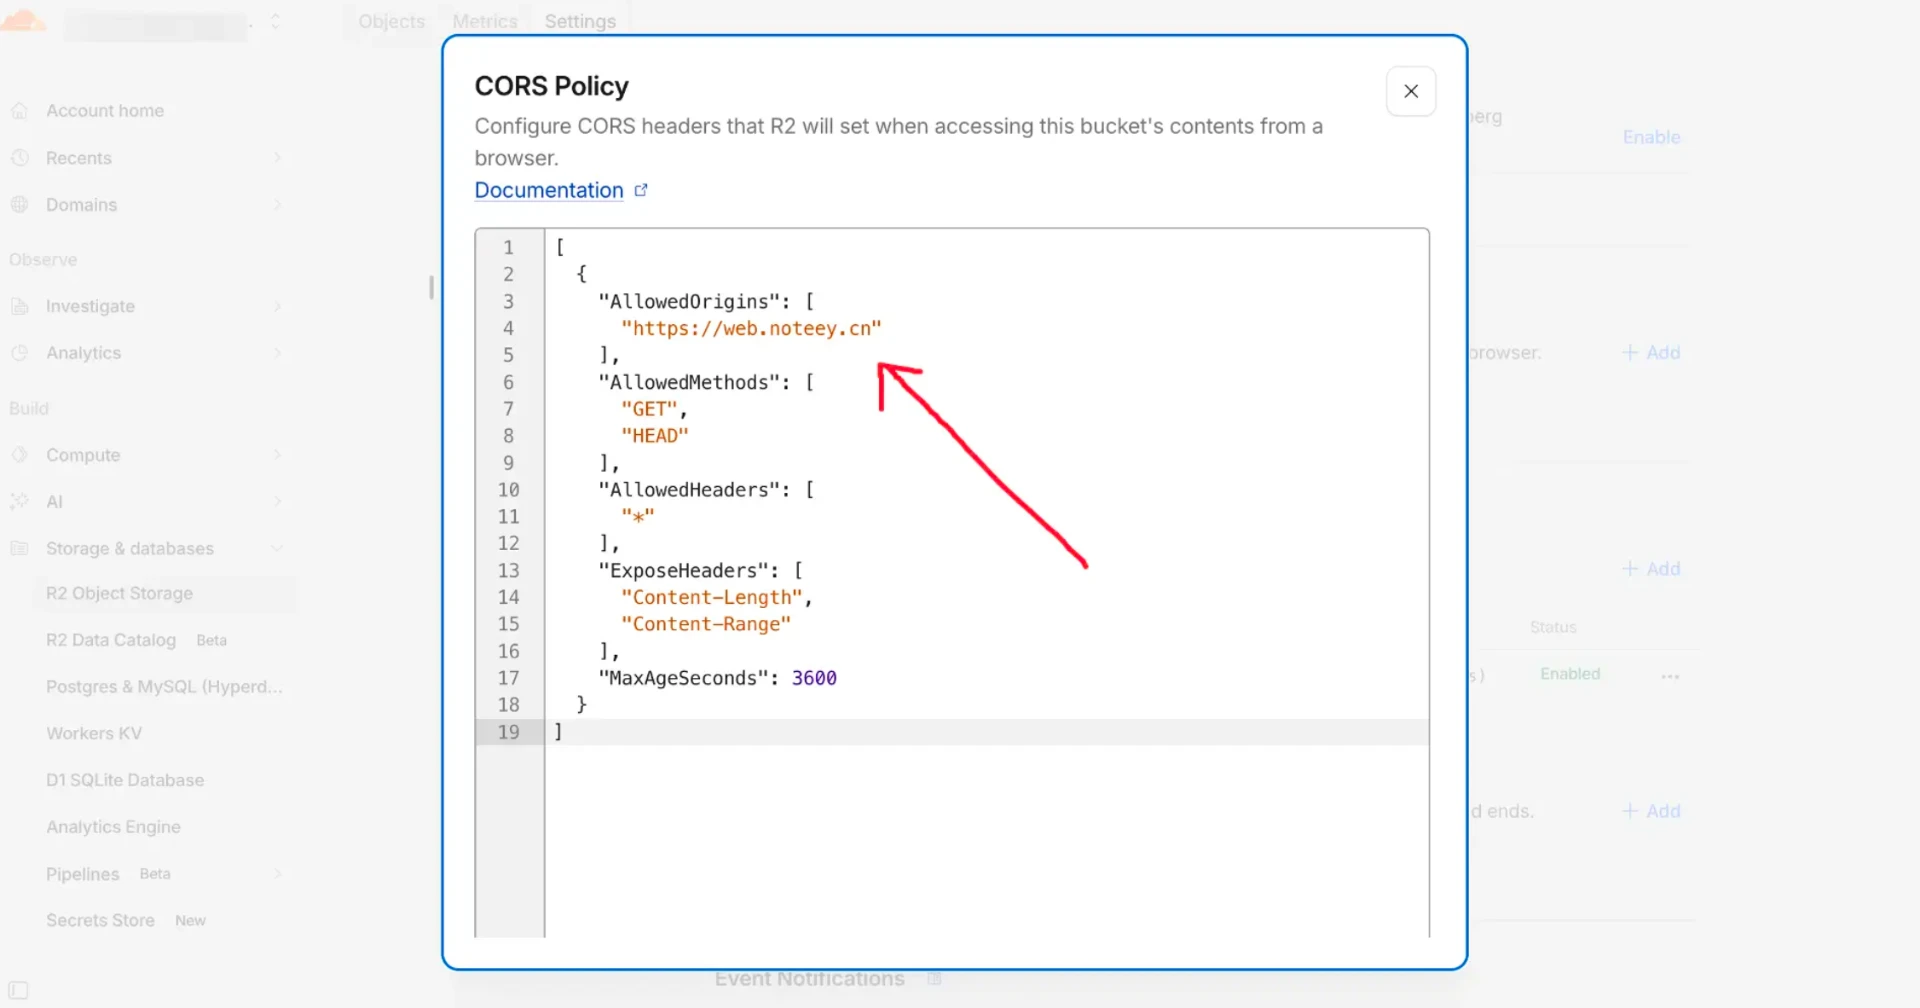
Still on the Settings tab, find CORS Policy and click Add. Allow the Noteey domains (such as https://web.noteey.cn) with the GET and HEAD methods.
- 5
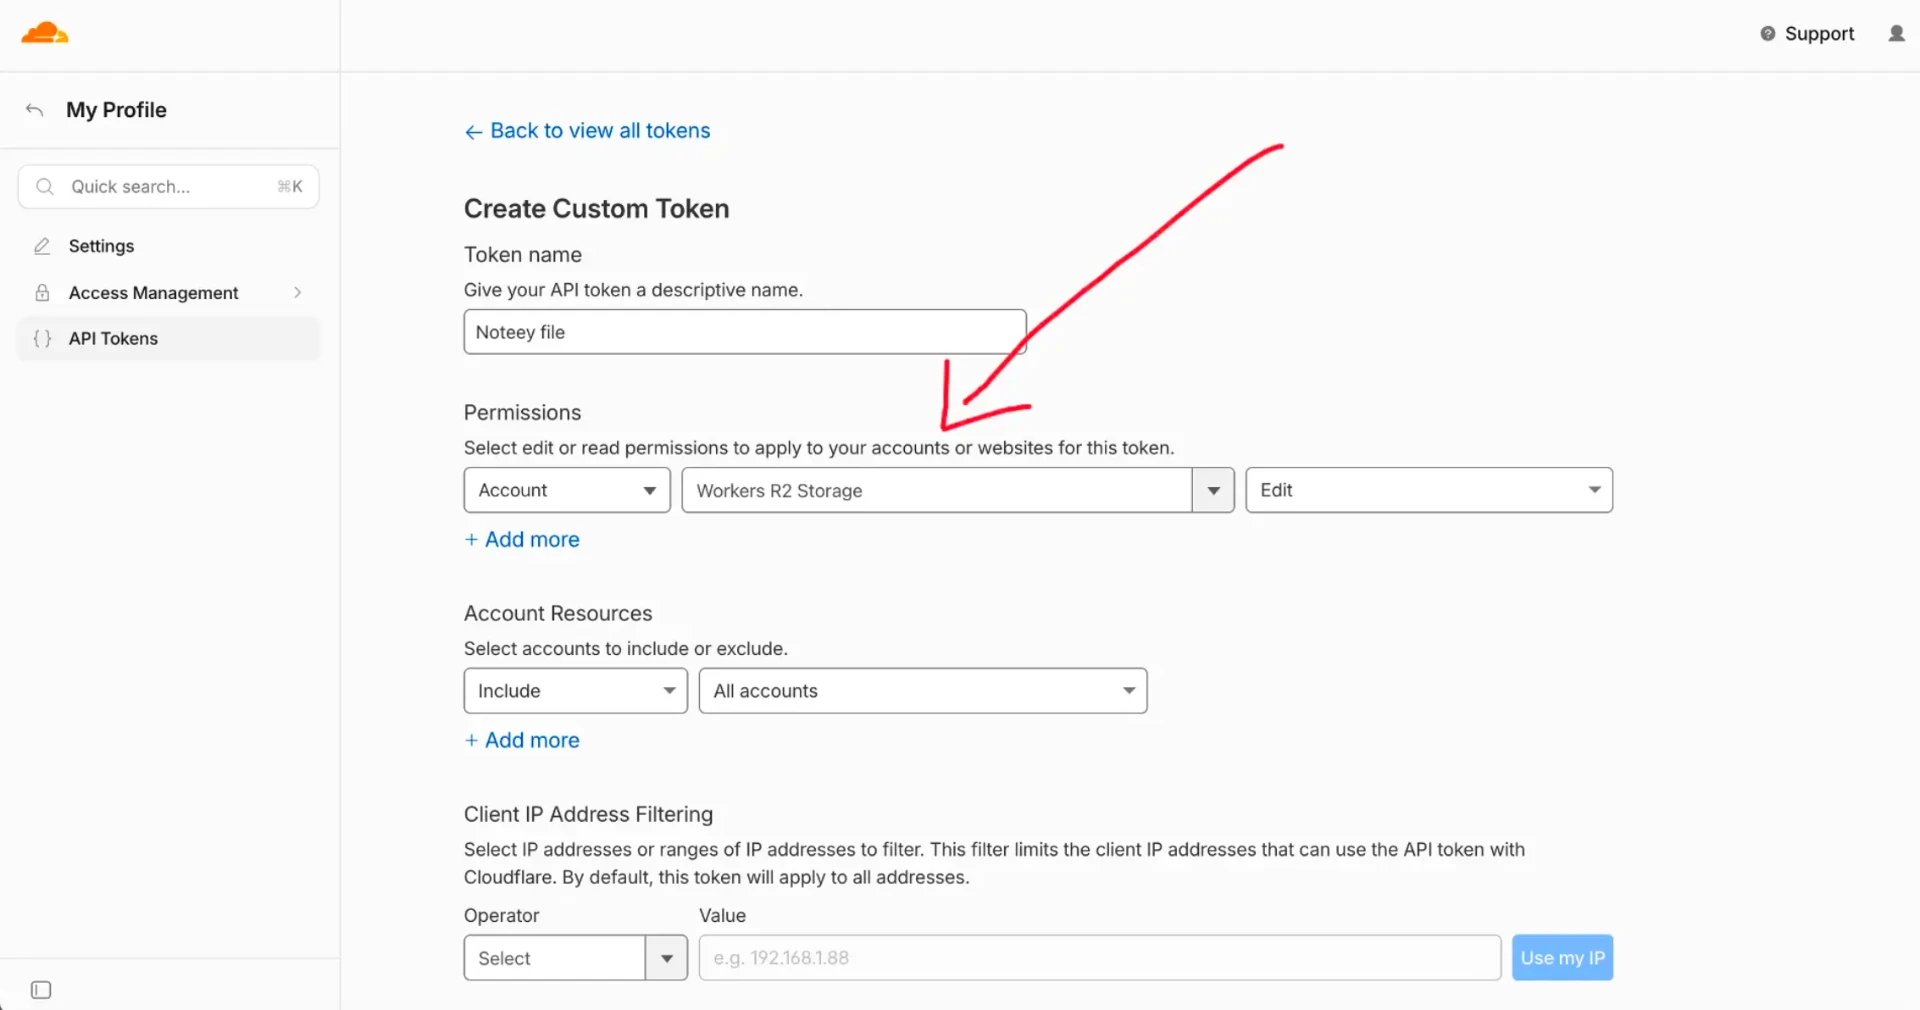
Step 5: Create an API token
Go to My Profile → API Tokens, click Create Token → Create Custom Token, and set the permission to Account - Workers R2 Storage - Edit. Save it and copy your API token (it is shown only once).
- 6
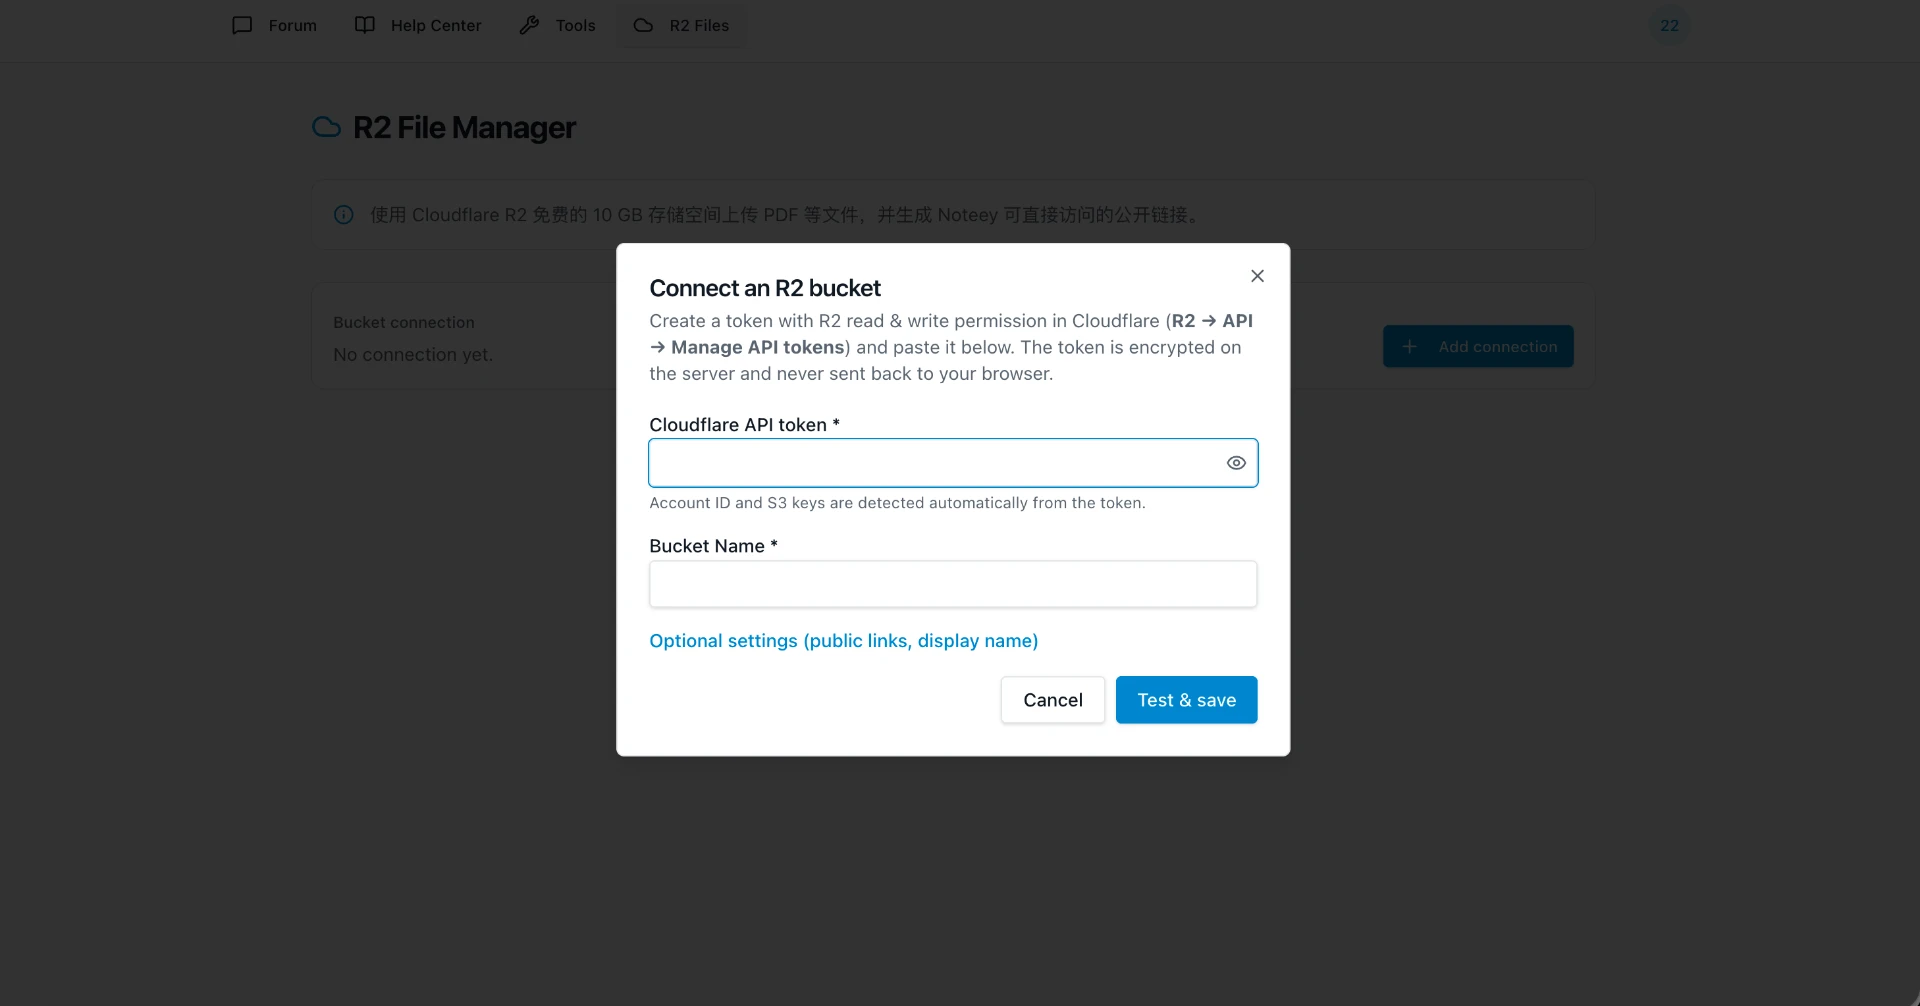
Step 6: Connect your bucket in Noteey Club
Log in to noteeyclub.com, open the R2 File Manager, click Add connection, paste your API token and bucket name (for example noteeyfiles), then click Test & save to start uploading.
Ready to go?
Head back to the R2 File Manager, add your connection, and start uploading.
Go to R2 File Manager